Continued from part 1
The Burlap
After doing some research on the different ways I could cut my table runner down to size without having to deal with fraying edges in the near future, I settled on two options:
- Using a mixture of 1 part mod podge and 1 part water
- Using some double-sided tape
Since I didn’t have any double-sided tape, but I did have mod podge (well, sort of) I decided to start off with testing that. I put my burlap runner down over some wax paper and mixed some school glue and water together in a 1:2 proportion (accidentally making mod podge in the process). Then, using a small sponge, I applied a generous amount of the mixture across my burlap (I made sure to saturate the fabric so that I didn’t have to turn it over and apply on the other side as well. After that, I hung my runner on the clothesline to dry.
You know what? It worked! ❗ (to my surprise)
Then, it was just a question of measuring out the length of burlap that I wanted and starting over with the mod podge before cutting it down to size.
Enter Pinterest
Of course, no decoration project is complete without the collaboration of Pinterest. So off I went in search of a manageable Autumn wreath to make.
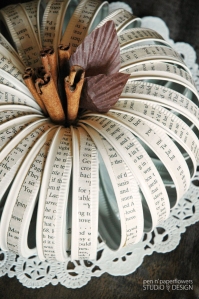
And then, I saw this:

I immediately knew that I had to make this. I also knew that following its confection, one of 2 things were going to happen:
1. It would become a super cute decoration that I could reuse year after year.
2. It would be relegated to the cemetery of Pinterest Fails
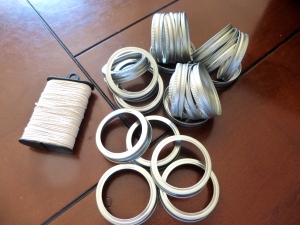
I started out by finding buying the required amount of canning jar rings, 25 to be exact (ok, truth: I only bought two packs of 12 ’cause I had one ring lying around at home) and a pack of cinnamon sticks.
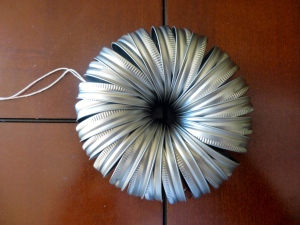
Then, I cut out a long piece of sting and strung my rings (all facing in the same direction) onto my string before trying to tie it. The moment of truth was about to be revealed, I crossed my fingers for it to work.
Imagine my surprise when it worked! On the first try! (Notice the piece of string still attached to the ring. Though the original tutorial call for cutting it, I suggest keeping it attached to aid in the next step).
Once my pumpkin shape was finished, I fished an old can of spray pain from my art supplies. I’d bought a black chalkboard paint aaaaages ago and thought that the matte black finish would look great. I went out on the balcony, held my art project by the string and spray painted it. Then, I made good use of my clothesline once more to let the paint dry.
Once dry, it was time to add the stem (a bunch of cinnamon sticks) and the leaves and showcase it on the shelf at the top of our entrance stairs. (The pumpkin has since been replaced by a butternut squash as it is now in this pie).
I’m thinking that this pumpkin craft could be fun to do with little (but not too little ones). Perhaps, the canning jar rings could be replaced with a slinky. Hum…will have to give that a try.
It felt so good to get involved in an art project again. It seems that in the process of building a family, I have somewhat forgotten myself.
Are there things that you loved to do pre-kids and haven’t taken the time to do in too long? What is the last Pinterest project that you have tackled?


Love the can lidded pumpkin, so creative! 🙂
Glad you liked it! It was much easier than I had anticipated and is super cute.
Oh so cute! I love to read fiction but can’t put a book down once I start so I don’t try to start nowadays. Just stick to science stuff because I can put that down.
Oooh, fiction is fun! That reminds me, I haven’t done that in…well since my son was born. Hope you find some time to read a great book from cover to cover soon!